Open topic with navigation
Scanning Checks
Once a batch is created, you are ready to scan. Make sure the front of the check is facing the MagTek logo as you insert it into the left side of the scanner.
Tip! If you keep the scanner on your right side, you can quickly type in the check amount as it exits the scanning machine.
A check may get scanned correctly, but the Account and Routing fields remain empty. Any checks printed on a laser or ink jet printer may not use magnetic ink. The scanner requires magnetic ink to be used in the MICR number at the bottom of the check. If the ink is not magnetic, the Account, Routing and Reference fields must be entered manually.
Note that Contributions keeps a running total of all entered contributions. Ensure that the total matches the total you entered for the batch. If not, you can review the batch in the Batch Contributions area and correct any data entry mistakes.
To scan a check
- Create a batch before scanning. See Creating a Batch for details.
- Take a check from the batch and insert it into the check scanner. Once inserted, the scanner grabs the check and pulls it through automatically.
- Type the total of the check in the Amount field.
- Select the individual to apply the contribution to from the Attributed To drop-down list. You may also choose to leave the Household option selected.
Note: The Attributed to only includes the organization name and is selected by default if an organization is the selected contributor.
- Select the following fund options:
- The Fund to which the contribution is to be attributed.
- Optionally, the Sub Fund to which the contribution is to be attributed. This field will only be available if there are active sub funds associated with the selected fund.
- Optionally, the Pledge Drive to which the to which the contribution is to be attributed. This field will only be available if there are active pledge drives for the selected fund (and sub fund if applicable).
- Optionally, type any notes in the Memo field.
- Select the Received Date using one of the following methods:
- Select the month, date or year elements in the date field and use the up and down arrow keys on the keyboard to change the date.
- Click the down arrow on the date field to display the calendar where you can choose the date.
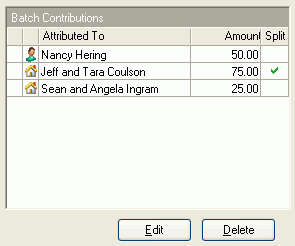
- If the contribution is split in any way (between funds or between household members), click the Split button.
- Click the Save button. The contribution appears in the Batch Contributions list as shown below.