Before the pipeline can be started, the volunteer application must be created. You will need to gather a few things before starting:
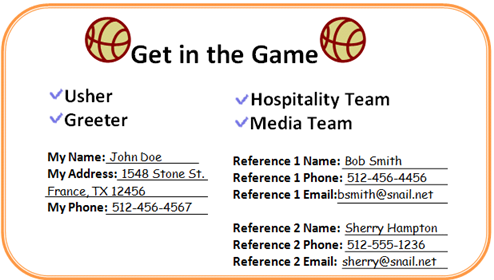
Use the step by step procedures below to create a volunteer application. Here's an example application to get you started:
Note: WebLink and Administrator access rights are required to create or edit volunteer applications.
To create a volunteer application
Associated users are the ministry leaders responsible for scheduling the volunteer once the prospect has completed all requirements for this position. These ministry leaders must have a Fellowship One user name and the Ministry Write security access right to the associated ministry.
The recommendation is to add more than one ministry leader to the Associated Users list.
Tip! Add all of the potential ministry leaders that can follow up with this prospect. They can share responsibility even though only one Fellowship One user needs to follow up with the individual.
A requirement represents a qualification that must be met by a person in order to participate as a volunteer in the capacity for a specific job. For example, in cases where all children's care volunteers must have a background check, the background check is the requirement. Common requirements are:
These requirements are configured in Admin > People Setup > Individual Requirements, but can also be configured on the fly when you are creating your application.
When adding requirements you have three Requirement Type choices. 90% of your requirements are going to be specific to your church and will be “Standard Requirements”. These are requirements like “Audition”, “Interview with Pastor Bill”, “Membership Status”, etc. The other 10% of jobs will be the special types Reference Check and Background Check.
Fellowship One treats background checks and reference checks specially. It provides additional questions on the volunteer application requiring a social security number for background checks and fields to enter a reference's contact information for reference checks.
Additionally, you can choose to add automatic background check processing through one of the preferred background check companies that are configured to interface with Fellowship One. If you choose to do this, background checks are automatically requested the moment the prospect reaches the “Requirements” stage of the pipeline.
An automatic background check will not be requested if the following conditions are present:
If you are interested in this service, please you are interested in signing up for automated processing please create a Support case. Note in the subject and message boxes that you are interested in automatic background check processing. See Creating a case for more information.
Next, you will add all requirements that could be associated with any volunteer job, and any other requirements that you want the volunteer coordinator to check before the new volunteer can receive an assignment.
Tip! Add all requirements to this opportunity that must be fulfilled before the person can be assigned to the job you have created in your ministry. For example, if you have a Greeter job that requires the user to have an Interview, a Statement of Faith, and a Background Check. All three of these requirements should be added to the Greeter opportunity on your Volunteer Application.
When creating your volunteer application, you have the ability to add requirements as you are adding your job opportunities.
To add a requirement
If you are creating a Reference Check type requirement, use the following procedure.
When you are finished adding requirements, click Done with requirements. If you selected a Reference Check requirement, the Reference Questions form appears.
When you select a Reference Check type requirement for a volunteer opportunity, you will need to configure questions for use when interviewing the person who will act as a reference for the prospective volunteer.
The ability to create reference questions will only appear if you have selected a requirement that is has been defined with the Reference Check requirement type.
Some example questions might be:
Notice the [[FNAME]] in the questions above. If you use this dynamic text within your question, it will automatically replace with the prospective volunteer's first name at the time the Volunteer Coordinator is conducting the reference check interview.
To create a reference question
When you have finished creating questions, click Done with questions. The Form Summary appears. Continue adding volunteer opportunities to the application until you have all the opportunities created for this particular form. Click Continue.
You must always create a confirmation message if you plan on allowing people to complete this application online from your church website. Consider adding a thank you message and information about what the user can expect to happen. For example, “Thank you for your interest in serving at Dynamic Church. We will be contacting you soon with information about the jobs you are interested in. In the meantime, you may also contact Jill Cannon at 469‐442‐0100 if you have any questions.”
Note: You must have a Confirmation Message if you want to allow people to complete the volunteer application via your church website.
To configure the confirmation message