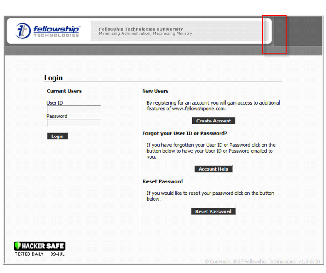
WebLink tools are accessed via a hyperlink or button on your church website. The website addresses must be constructed from encrypted codes generated by Fellowship One. The addresses are displayed below.
The report A8010 - WebLink Setup Codes located in the Report Library (click Reports) will create these links for you! We suggest running this report with the output type of Excel.
Note: It is not necessary to place the login module onto your website. It will launch whenever a user tries to access something that requires them to be logged in first. It will not launch if the user has already logged in previously.
Login
https://integration.fellowshipone.com/integration/login.aspx?cCode=insert encrypted church code
Logout
https://integration.fellowshipone.com/integration/logout.aspx?cCode=insert encrypted church code
New User Account
https://integration.fellowshipone.com/integration/newuser.aspx?cCode=insert encrypted church code
Reset Password
https://integration.fellowshipone.com/integration/resetpassword.aspx?cCode=insert encrypted church code
Login Help
https://integration.fellowshipone.com/integration/loginhelp.aspx?cCode=insert encrypted church code
Online Giving
https://integration.fellowshipone.com/integration/contribution/onlinecontribution.aspx?cCode=insert encrypted church code&flo=true
Small Group Finder
https://integration.fellowshipone.com/integration/activityfinder/activityfinder.aspx?cCode=insert encrypted church code&mCode=insert encrypted ministry code&aCode=insert encrypted activity code
(aCode is optional if you have multiple small groups activities within the ministry, but needs to be used if there is only one small groups activity)
Small Group Manager
https://integration.fellowshipone.com/integration/smallgroup/sgmembers.aspx?cCode=insert encrypted church code&aCode=insert encrypted activity code
Volunteer Application
https://integration.fellowshipone.com/integration/volunteer/volunteerapplication.aspx?cCode=insert encrypted church code&appCode=insert encrypted volunteer application code
Contact Form
https://integration.fellowshipone.com/integration/contact/onlinecontact.aspx?cCode=insert encrypted church code&ctCode=insert encrypted contact form code
Profile Editor
https://integration.fellowshipone.com/integration/profileeditor.aspx?cCode=insert encrypted church code
Relationship Manager
https://integration.fellowshipone.com/integration/Relationship/RelationshipNotes.aspx?cCode=insert encrypted church code
The codes required for the previously listed web addresses are available in the Integration Code look up tool. Use the following procedure to find the required codes.
To use the integration code lookup tool
Note: The church code appears automatically. Copy the entire string in the Church Code field and use it in each of the website addresses.
Note: Be careful when creating the website address. It is easy to accidentally insert a space into the address. The completed address will contain no spacing. Additionally, if the address requires multiple pieces, the ampersand (&) sign must be used to join the pieces together.
An example of a completed website address appears below. This example is for Small Group Finder for the Education Services training database (your codes will be different than the ones displayed below).
https://integration.fellowshipone.com/integration/activityfinder/activityfinder.aspx?cCode=P7fQtbvFKI5qPleteABbA==&mCode=cI7HkYuW9QCjXfK8Q1Oo+Q==&aCode=4paC/kDrDfw+J2ettJA+Vw==
When you have completed creating all the website addresses, you are ready to put the links on your church website.
Note: Make sure you have made all configurations before placing the links on the website. Each of the WebLink modules has a different set of requirements that must be met before the tool can be used.
Place the links in logical locations on your site and place them so that when clicked, the tool opens in a new window. It is very important to launch the tool in a new window because as you undoubtedly noticed when creating the addresses, the links all go to the Fellowship One servers.
Since you never want to replace the content of your own church website with anyone else's, it's a good idea to always launch the tools in a new Internet window. While you're doing this, you can also resize the window. The purpose of this is two-fold:
The header graphic has a default 600 x 65 pixel size (remember, this default size can be changed by modifying the style sheet as explained in Changing the Look and Feel of WebLink). If you open the window at a width larger than this size, the background color of the header area will show to the side as shown below.

Resizing the window points out that the tool is meant to be used and then closed. Once closed, the user is returned to the church website.
There are a number of ways to open in a new resized window.
Method 1: Some HTML editors actually have functions built into their Hyperlink tools that allow you to pick a target frame. If you select New Window or _blank, the website address will open in a new window. In HTML code, this function appears as follows:
<a href="https://WebLink Web Address" target="_blank">Click here</a>
Method 2: is the preferred method. This method allows you to very closely control the new window as it opens. This method takes two parts. The first part is inserting Java Script code into the top area of your web page's HTML code.
<SCRIPT LANGUAGE=”javascript” TYPE=”text/javascript”>
function launchcontact(){window.open(“https://integration.fellowshipone.com/integration/contact/onlinecontact.aspx?cCode=P7fQtbvFKI5qPleteA/BbA==&ctCode=GjbeNxRJNI6GseqHIYtwyw==”, ““,”width=700,height=700,top=100,left=100,resizeable=yes,scrollbars=yes,menubar=no,toolbar=no,status=no,location=1”)
}
</SCRIPT>
Note: All of the elements in this code can be changed to sizes and options that make sense for your website. For example, if your header graphic size is 800 pixels wide, you will change the width element to width=800. Additionally, you can name the function anything you want. In this example, the function is named launchcontact( ). When you change the function name, change it in the input type line (onclick) below as well.
Place the following in the HTML code in the place where you want the button to appear.
<input type=”button” class=”inputbutton” value=”Contact Us” onclick=”launchcontact()” />
Note:Value tells the code what you want to name the button. You can type anything that makes sense between these double-quotes.